

Whitelist email addresses and domains
Add an email address or domain to your Trusted Senders list so its messages never go to Junk Email.
Trusted Senders skip spam scanning, so their messages never go to your Junk Email folder. Anyone in your Contacts is trusted automatically.
The quick way: trust a sender from a message
Step 1: Trust the sender
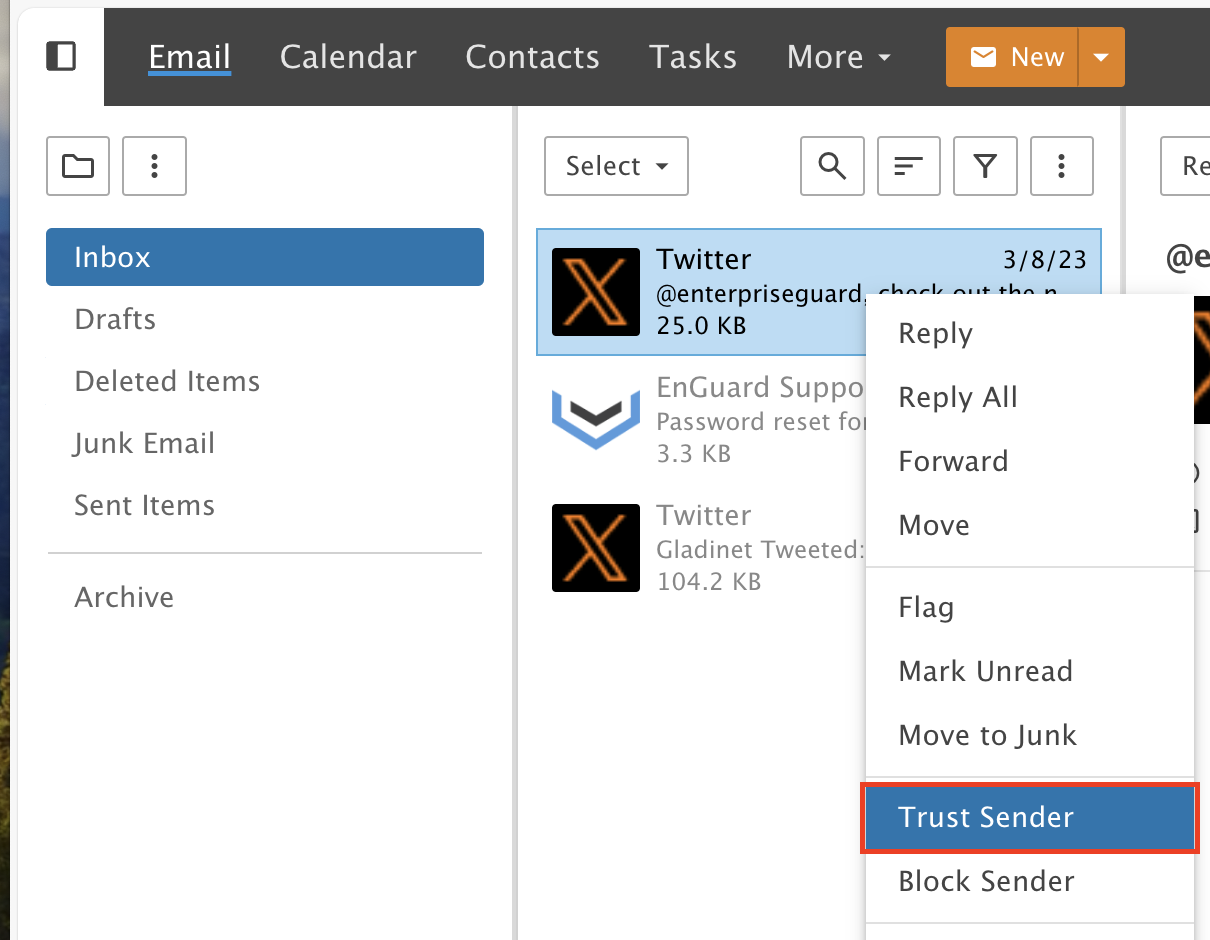
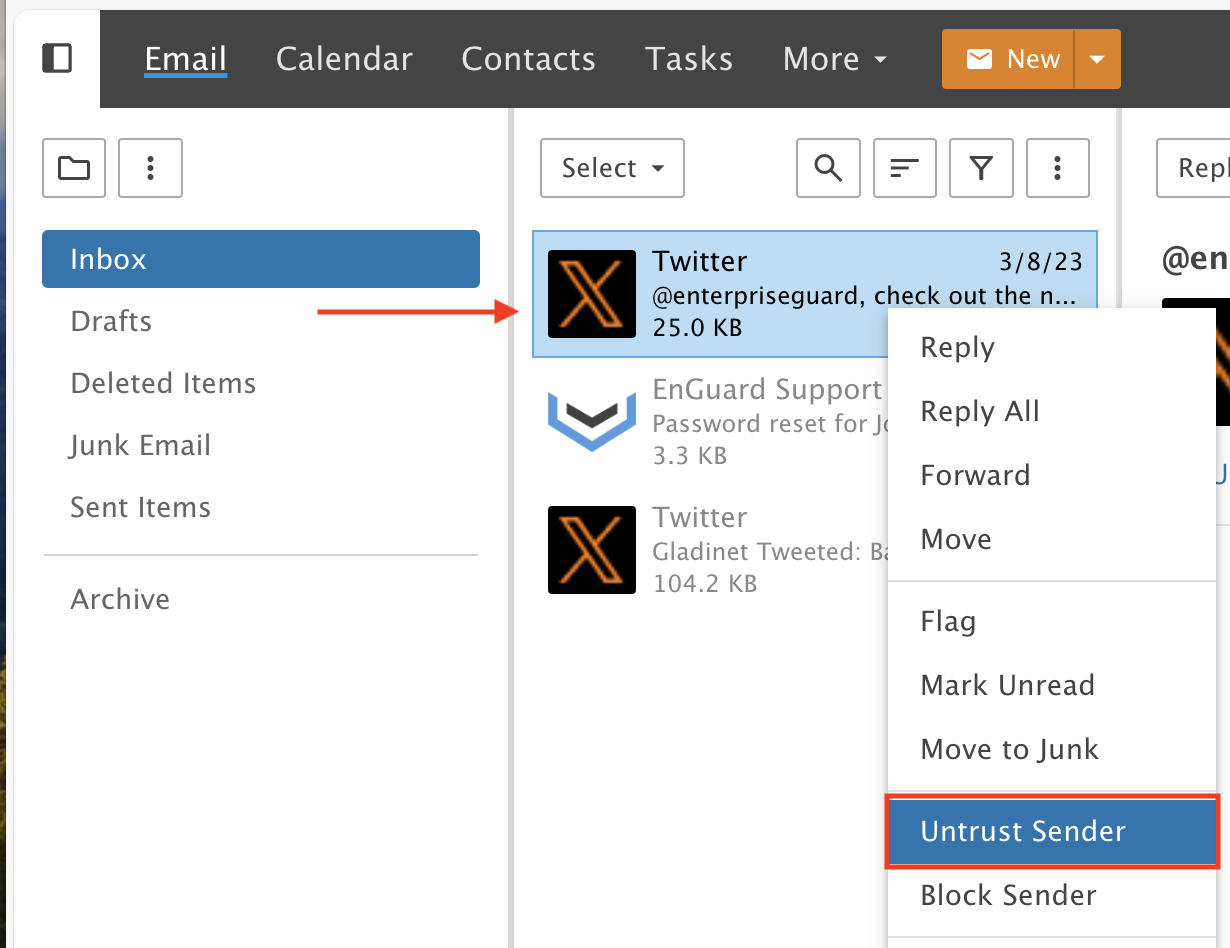
Right-click a message and select Trust Sender. This adds the sender to your Trusted Senders List.
Step 2: Look for the green shield
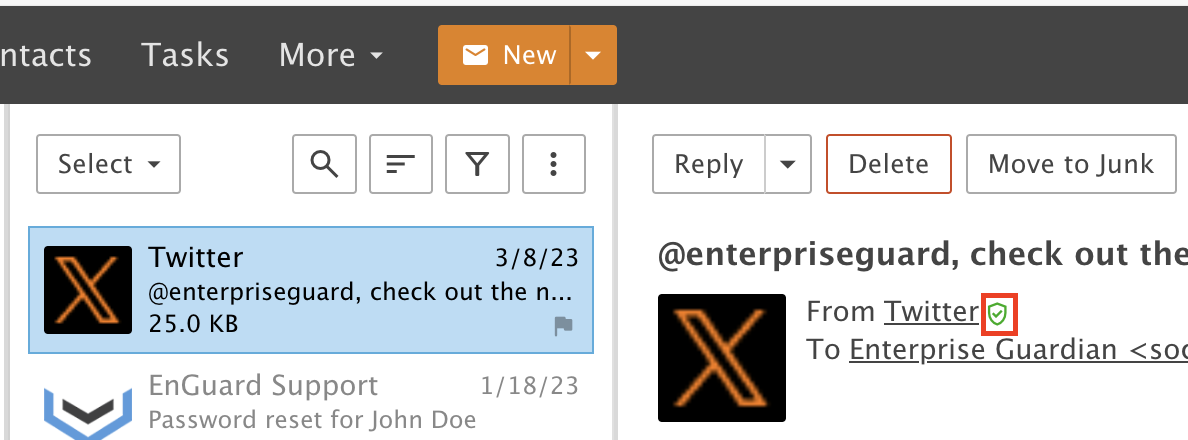
Every email from this sender now shows a green Sender Verification Shield.
Manage your whole list
Step 3: Open Settings
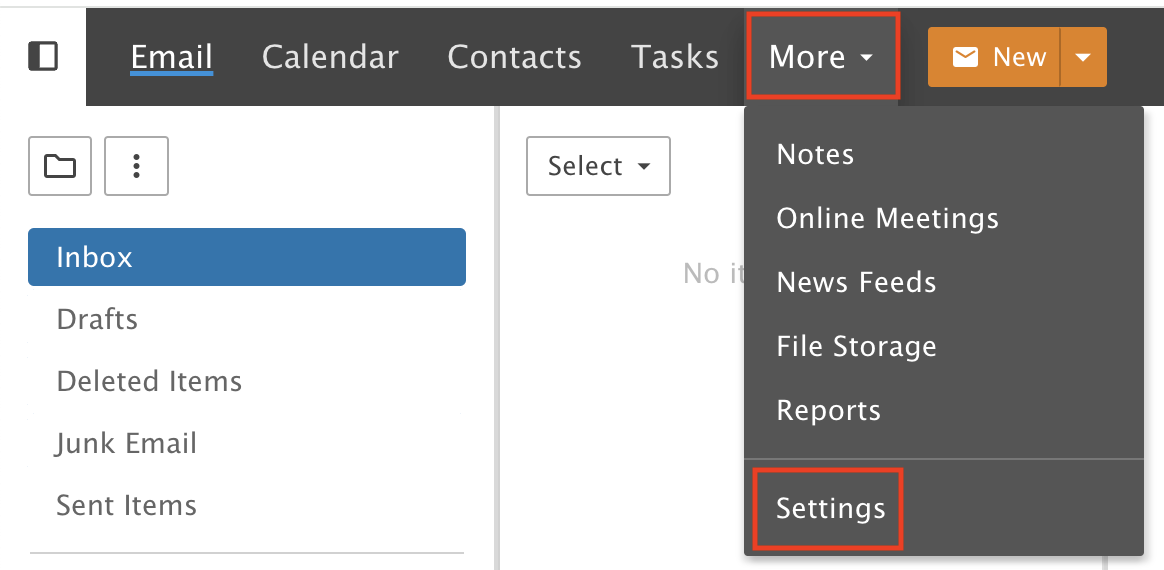
Click the More drop-down menu and choose Settings.
Step 4: Open Spam Filtering
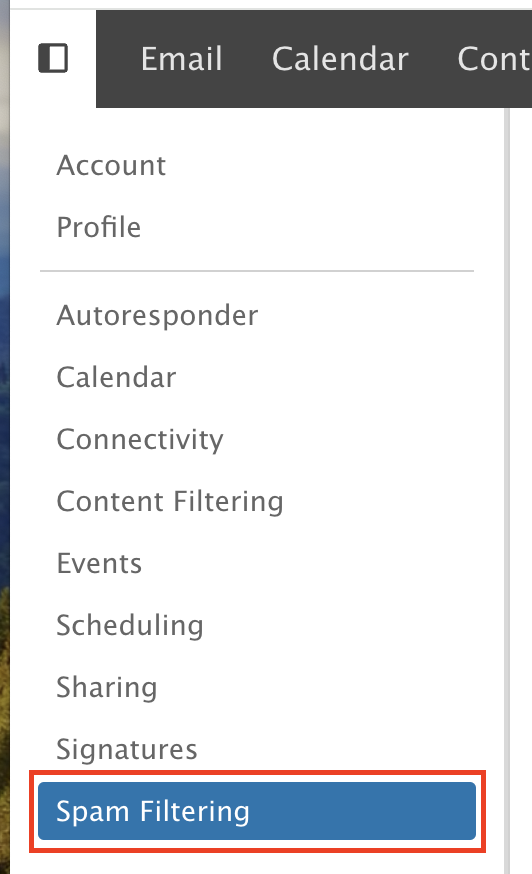
Click Spam Filtering in the left menu.
Step 5: Trust a whole domain
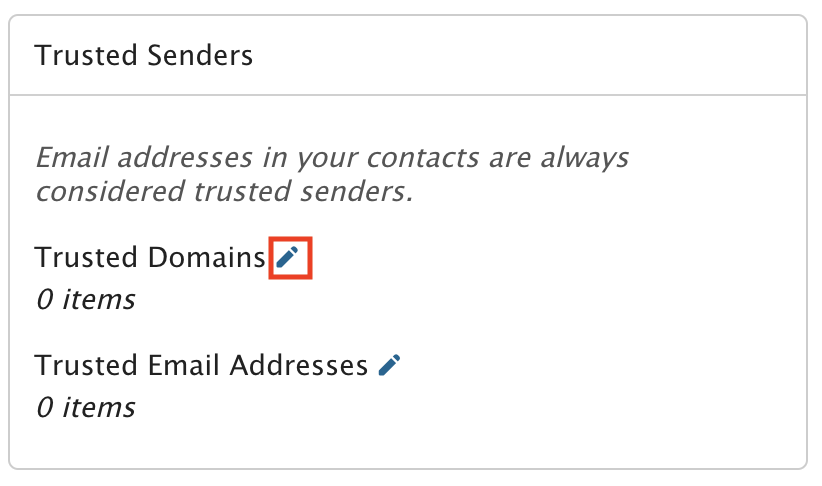
To trust all email addresses from one domain name, click the pencil icon next to Trusted Domains.
Step 6: Enter the domains
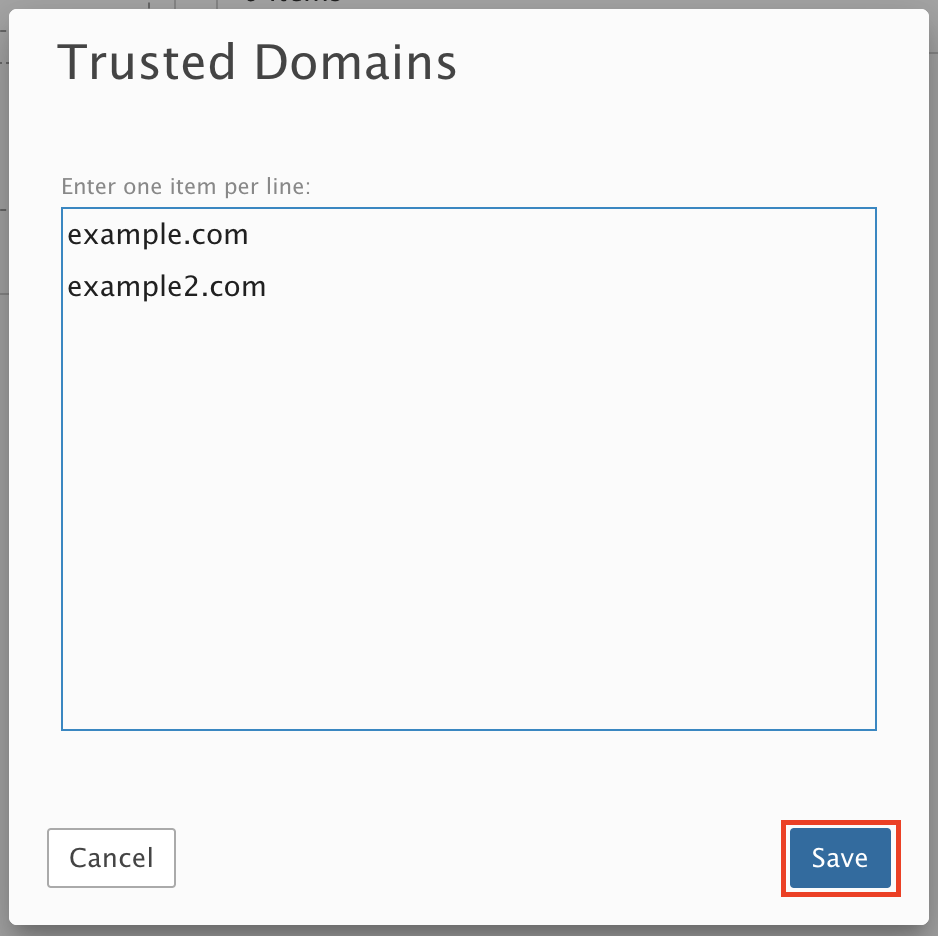
Enter the domains and click Save.
Step 7: Trust single email addresses
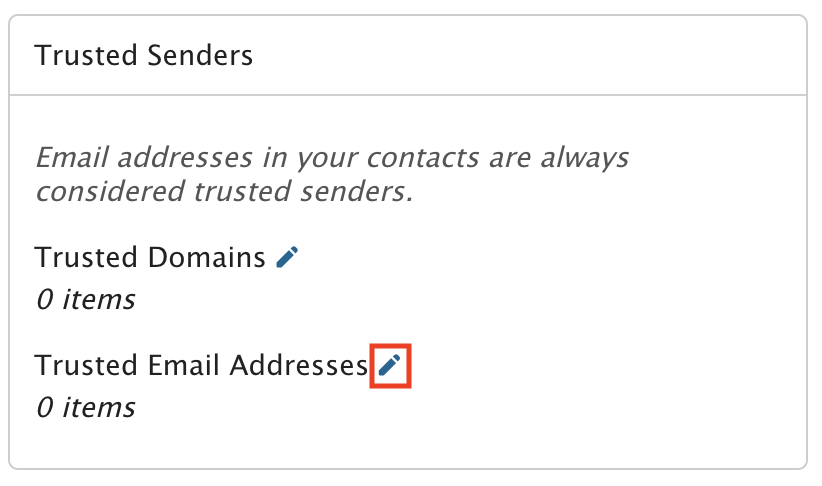
To trust individual email addresses, click the pencil icon next to Trusted Email Addresses.
Step 8: Enter the email addresses
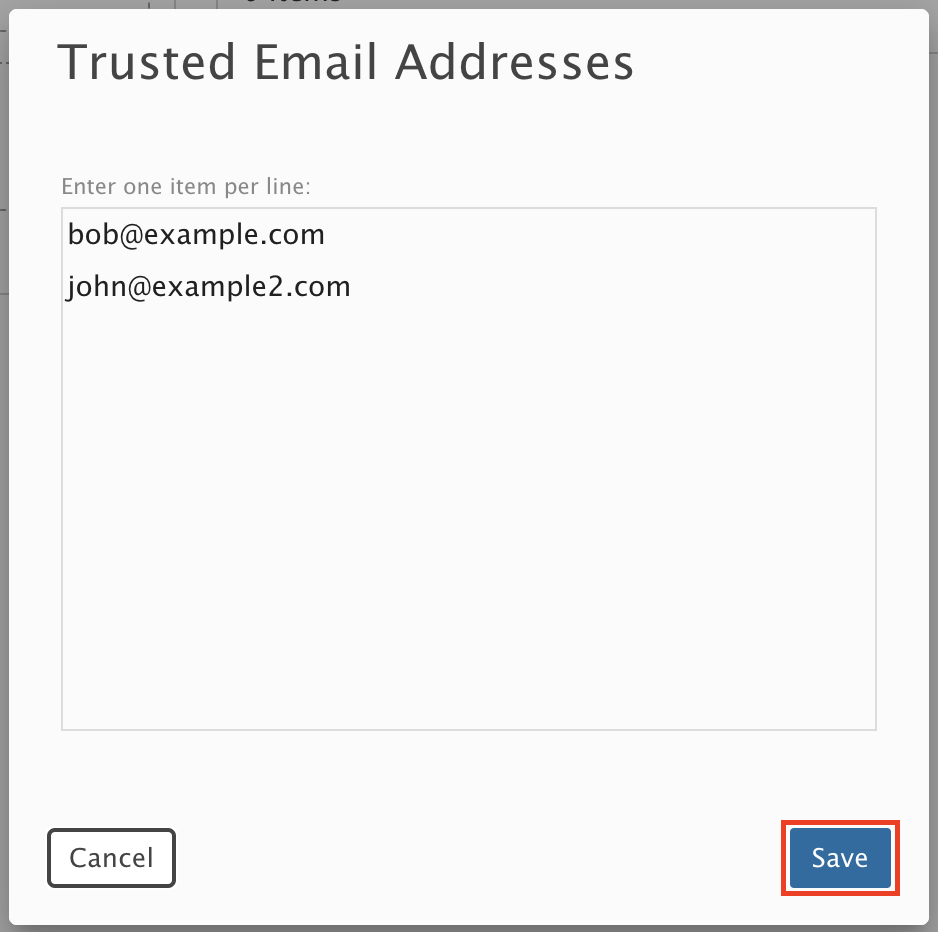
Enter the email addresses and click Save.
Step 9: Stop trusting a sender
To remove a sender from your list, right-click one of their messages and select Untrust Sender.
Company-wide trusted senders
If you are a company administrator and want a domain name or email address added to the Company Wide Trusted Senders List (for all users), send an email to our support team and we will add it for you.