Creating and starting an Online Meeting
Create, set up, share and run an online meeting with audio, video and chat.
EnGuard Online Meetings include real-time audio and video chat, inline group chat and document sharing. They are a great way to talk with your patients or meet with your team. There is no software to download and no service to sign up for. Meetings work on desktop and mobile, as long as your mobile browser supports WebRTC.
Before you start
- The host must use Microsoft Edge or Google Chrome on a computer. We do not recommend hosting from a mobile phone.
- You can invite any number of people. Audio and video chat is peer-to-peer, so it is limited to 9 concurrent users. An unlimited number of people can use the group text chat.
- The video quality depends on the internet speed of each person in the meeting.
- No data passes through or is saved on EnGuard servers, so your meeting is 100% private.
- Everyone must be on wired ethernet or WiFi. We do not support cellular data or satellite internet.
- Participants need a PC or Apple computer with a web camera, or an iOS or Android mobile device.
- Each participant must allow access to the camera and microphone when asked.
- A firewall or network settings on your computer or theirs can hurt meeting performance.
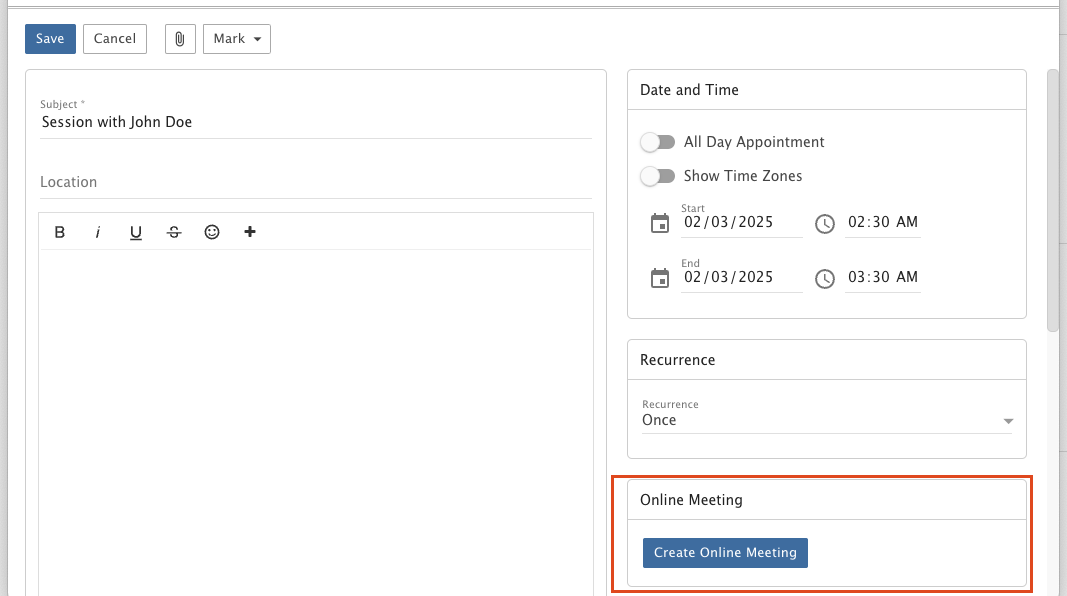
You can also set up and schedule meetings from your calendar. When you create a meeting invitation, whether it is one-time or recurring, you can create an online meeting at the same time. The link goes out with the invitation.
Part 1: Create a meeting
Step 1: Open More
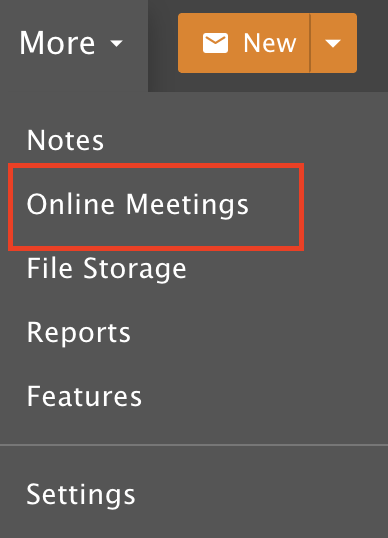
Click More in the top navigation bar.

Step 2: Open Online Meetings
Click Online Meetings.
Step 3: Start a new meeting
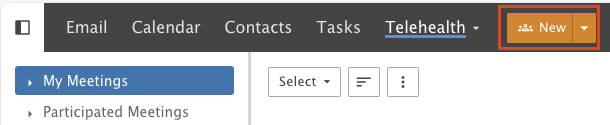
Click New.
Step 4: Title your meeting
Type a Title. The title is the only thing you need to save the meeting.
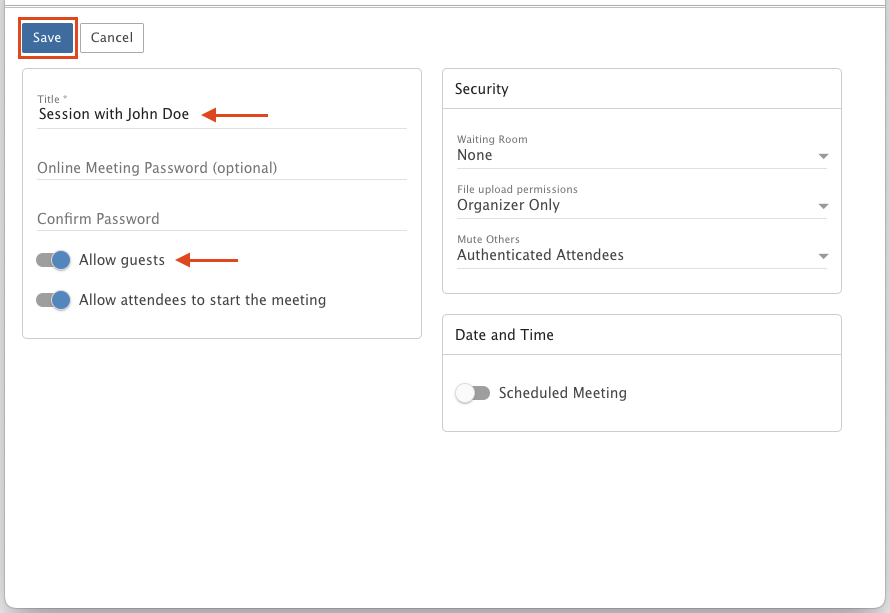
You can also add a password, or schedule the meeting so you can use it again and again.
We recommend turning on Allow guests. It makes joining easy for your participants.
Click Save. You can stop there, or open the meeting and change more settings.
Part 2: Meeting settings
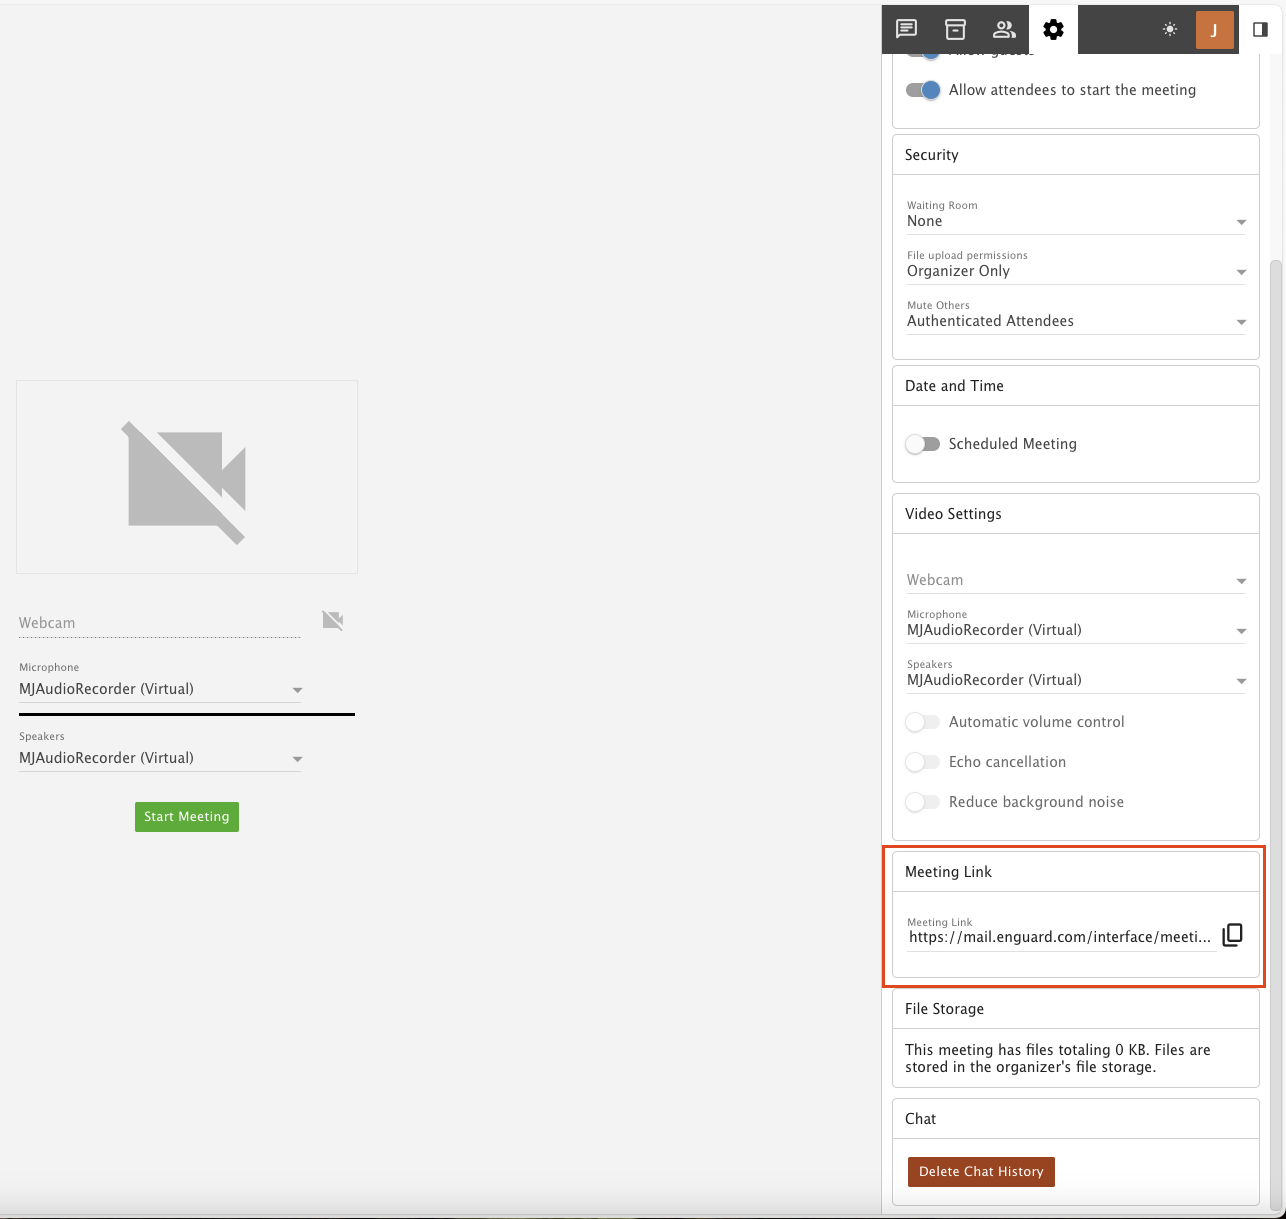
After you create a meeting, you can open it and change its settings. You can come back at any time by clicking the gear icon when you open the meeting.
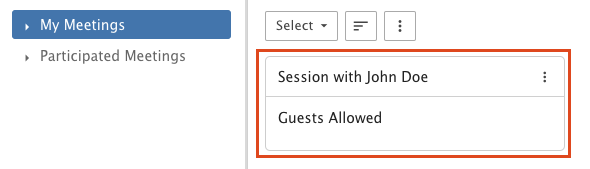
This is what the Online Meetings page looks like:
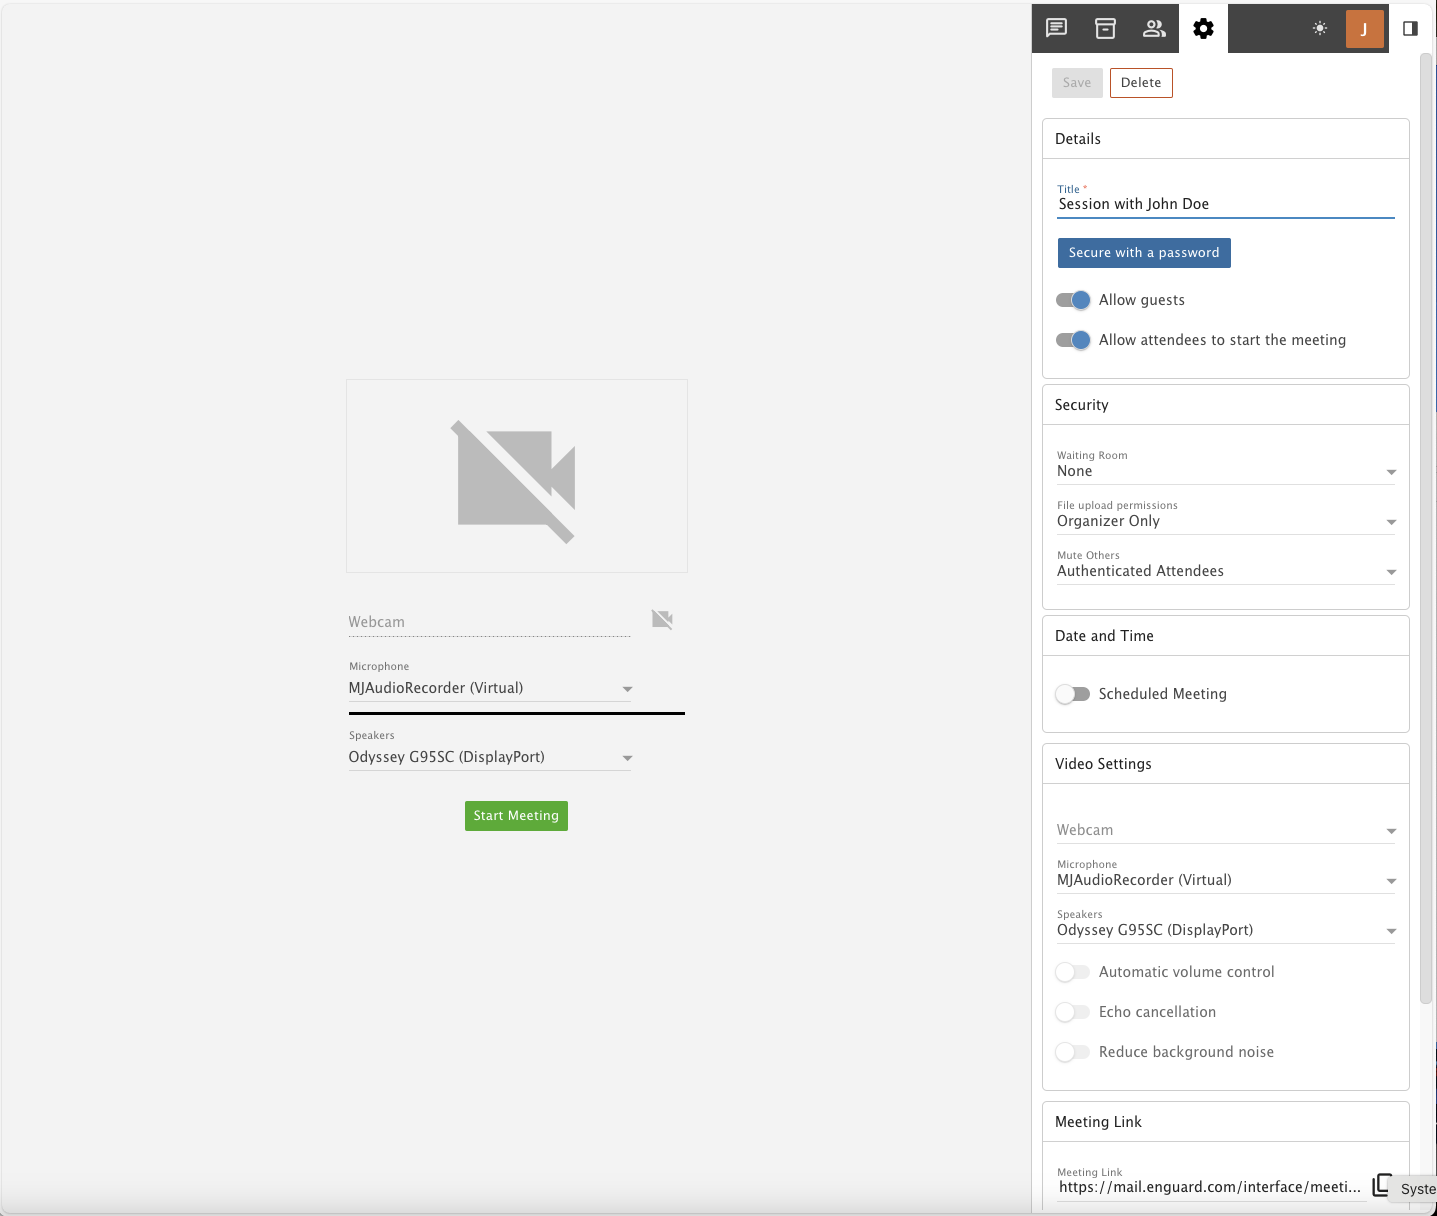
Details
Title: the name you gave the meeting. You can change it at any time.
Secure with a password: lock the meeting with a password you choose. Tell your participants the password when you send the invitation, or they cannot join.
Allow guest users: turn this on and anyone with the link can join without logging in.
Allow attendees to start the meeting: on by default. Attendees can start the meeting even if the organizer is not there.
Security
Waiting Room: choose who has to wait to be let in: None, Guests or Everyone. When someone joins, a pop-up tells you they are waiting.
File upload permissions: choose who can upload files: only the organizer, logged-in users, or anyone.
You can limit the file types that can be uploaded to an online meeting, but EnGuard sets those file types.
Mute Others: choose which type of attendee can mute other participants. They cannot un-mute anyone. People have to un-mute themselves.
Date and Time
Scheduled Meeting: turn this on if you want to use the same meeting again and again. It works like a recurring calendar appointment, with a start and end date and time.
If the meeting was created from a calendar appointment, these settings copy the appointment's dates and times.
End Behavior: when the schedule ends, choose Archive Meeting (ends the schedule but keeps the meeting in your list), Delete Meeting, or Keep Active.
Video Settings
Webcam: the stream quality. Video uses a lot of bandwidth, so keeping this on Low is best if you can.
Microphone: the microphone you use in the meeting. It usually starts as your computer's default. You can change it to headphones, a USB mic or another input.
Speakers: the audio output for the meeting. It also starts as your computer's default, and you can change it.
There are also some advanced audio controls:
- Automatic volume controls: EnGuard raises or lowers the meeting volume for you.
- Echo cancellation: EnGuard handles echo for you.
- Reduce background noise: EnGuard cuts background noise picked up by your microphone.
Meeting Link
This is the link you share with anyone you want at the meeting. Select the text and copy it, or use the copy icon.
File Storage
This starts empty. As you use the meeting, it tracks how many files were shared and how much space they take.
Chat
You may want to delete the chat, for example if you use the same meeting every week or month. You can wait until the notes were copied to a separate document or the action items became tasks. This is where you delete all the live chats from the meeting.
Save Settings
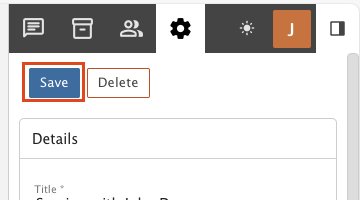
When your settings are ready, click Save.
You can change a setting during the meeting, such as letting guests upload images. It takes effect right away.
Part 3: Invites and sharing
Online meetings and calendar invites
When you create a meeting invitation in your calendar, you can choose Create Online Meeting. EnGuard then creates an online meeting for the appointment. It uses the appointment's Subject as its name and shows up in the Online Meetings area. A link to the meeting goes out with the invitation to all attendees.
By default, these meetings allow guest users, have no password, and only let the organizer upload files. If you need to change any of that, do it before the meeting and send the changes to your attendees yourself.
If you cancel or delete an appointment that has an online meeting, the online meeting is not deleted right away. EnGuard removes those meetings in a nightly clean-up.
Access previous meetings
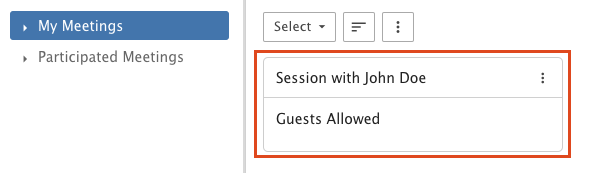
Every meeting you create is saved as a separate card, so you can open past meetings again. The video is not saved, but live chats and shared documents are, so you can look back at them later.

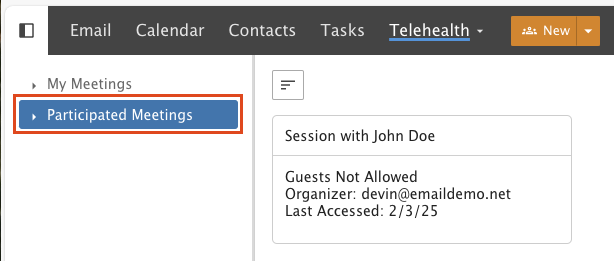
Participated meetings
This list also shows meetings you were invited to by other users in your organization. Click Participated Meetings in the left navigation pane. Each meeting you joined is a separate card. You cannot edit these cards, but you can revisit the meeting, see the chats, log back in to the video chat and more.
Share a meeting URL
There are two ways to get the URL:
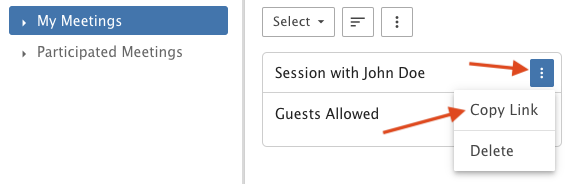
- Click the Actions (?) menu on the meeting's card and choose Copy Link. You can delete the meeting from this menu too.
- Open the meeting and copy the URL from its settings.
The first way is much faster. Use it to grab a URL and share it in a live chat, an email, a text message, or when you create a single or recurring appointment.
Part 4: Start and join a meeting
Start the meeting
Click the meeting to open it.
If your web browser asks for access to your microphone and camera, click Allow, then click Start Meeting.
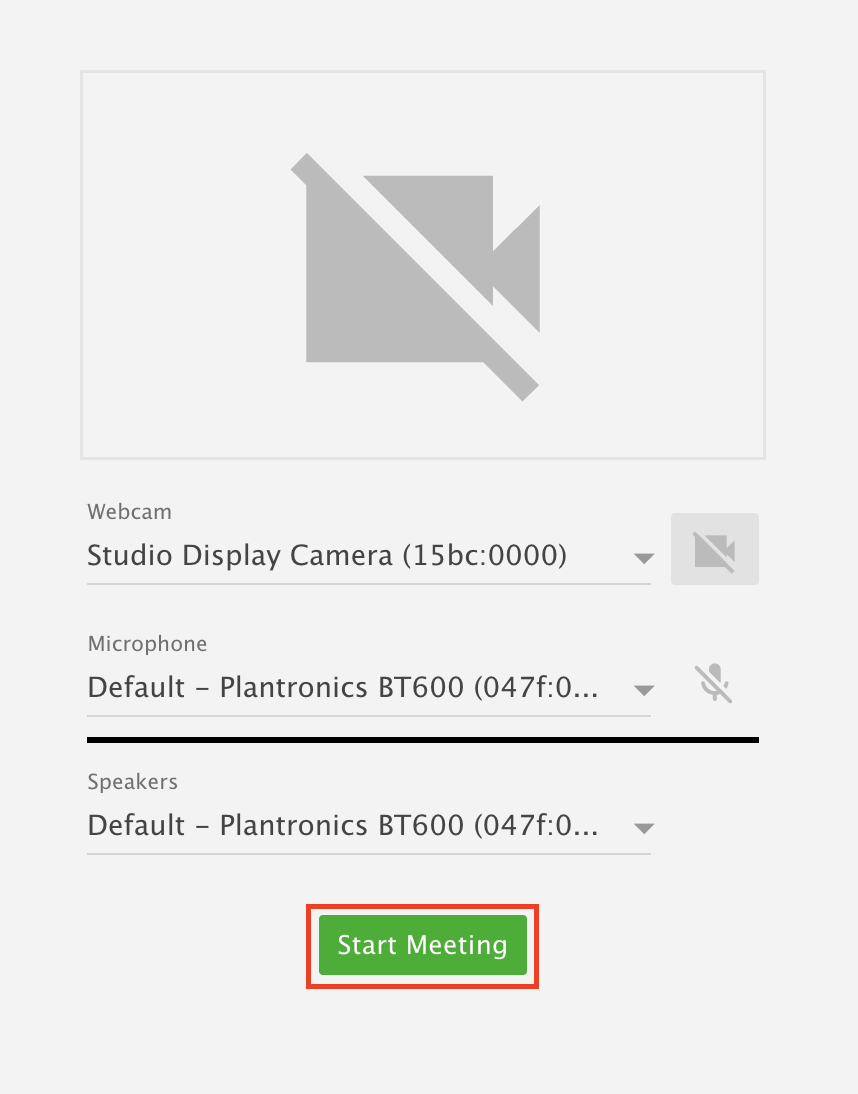
Turn ON your camera and microphone as you need them.
You can also share your screen here.
To end or leave the meeting, click the red Hang Up button.

Participant login
Your participants click the URL you sent. It opens a browser tab with a prompt. They choose Login as guest. This only shows if you turned on Allow guests in the settings.
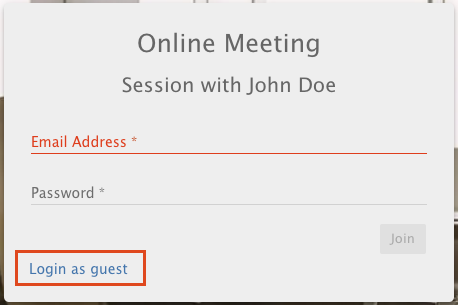
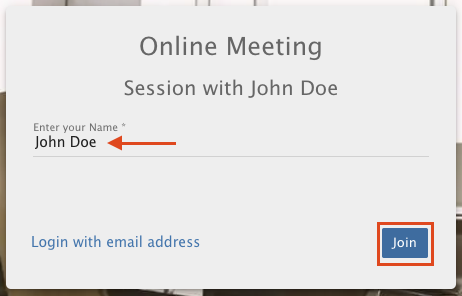
They type their name and click Join.
If their browser asks for access to their microphone and camera, they click Allow.
They click Start Meeting.