Email Setup on Apple Mail in macOS Sequoia
Add your EnGuard IMAP email account to Apple Mail on a Mac with macOS Sequoia, step by step.
When this guide was written, the latest macOS was Sequoia 15.0. Make sure your Mac is up to date so the screenshots match.
Do not skip any steps, and do them in order. If you skip a step or leave one unfinished, the setup will likely fail.
You need your current email address and password to add your account to the native Mail app on your Mac.
The screenshots are for reference only. Please read the instructions at each step.
Part 1: Find your mail server address
You will use the mail server address for both incoming mail server and outgoing mail server settings when adding your email account to Mail.
Step 1: Open webmail in your browser
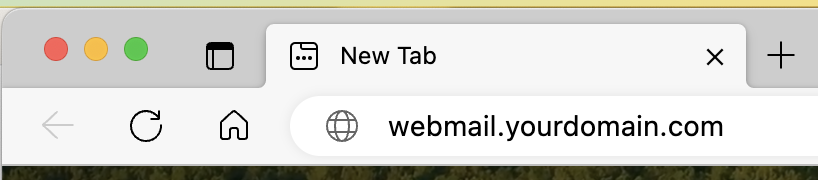
Open a web browser on your computer and type webmail.yourdomain.com in the address bar. Replace yourdomain.com with your own domain name.
For example, if your email address is bob@xyzhealth.com, you would type in webmail.xyzhealth.com
Type it in the address bar at the top of the browser, not in a search box (Google, Bing, Yahoo and so on). Do not type http:// or https:// in front of it.
Step 2: Find your mail server address
You will be sent to your mail server automatically.
Your mail server address is the first portion of the URL.
In this example, the mail server address is: mail.enguard.com

Step 3: Write it down
Write down your mail server address. You will need it for the steps below.
Step 4: Test your login
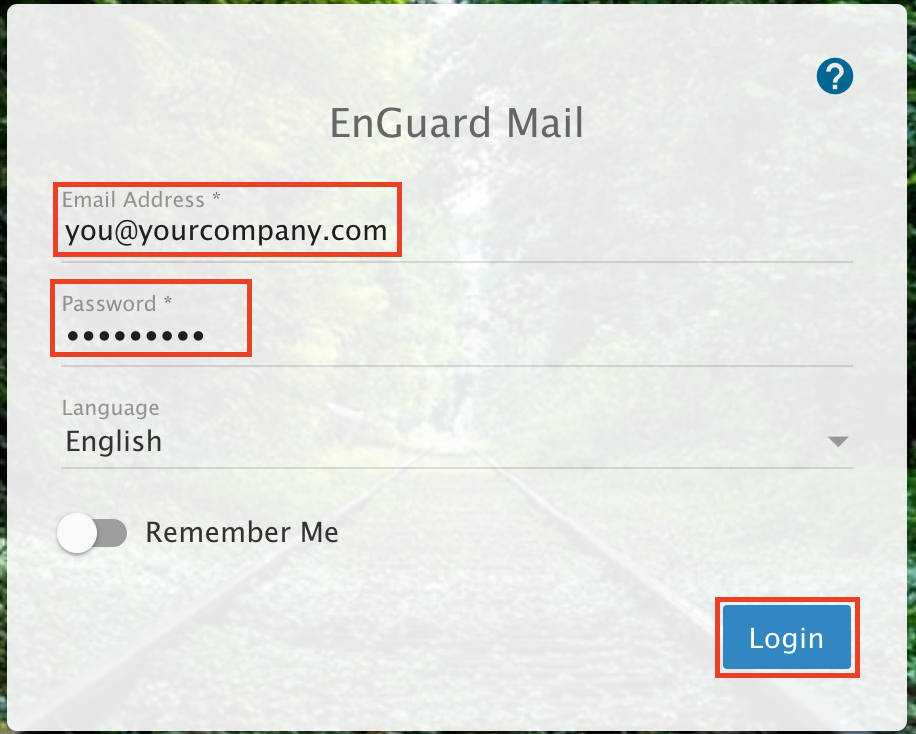
Check that your email address and password work by logging in to webmail.
If you cannot log in, ask your administrator for the correct login.
Part 2: Add your email account to the Mail app
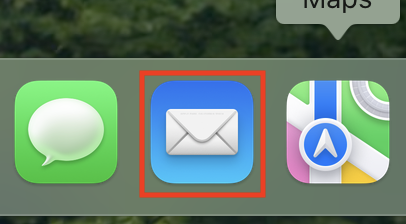
Step 5: Open Mail
Step 6: Open Settings
From the Mail menu (top left), select Settings.
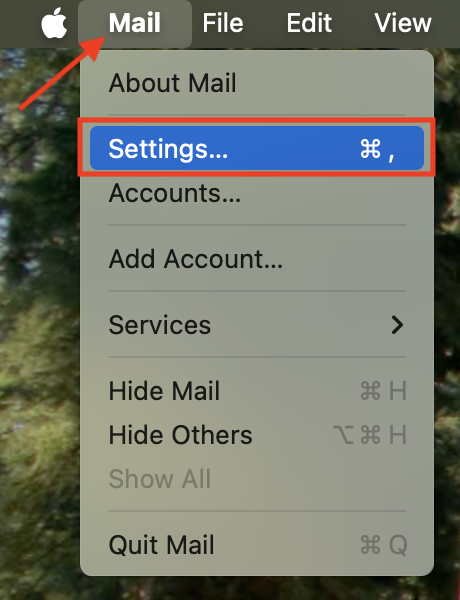
Step 7: Add an account
Click the Accounts icon, then click the + sign at the bottom left.
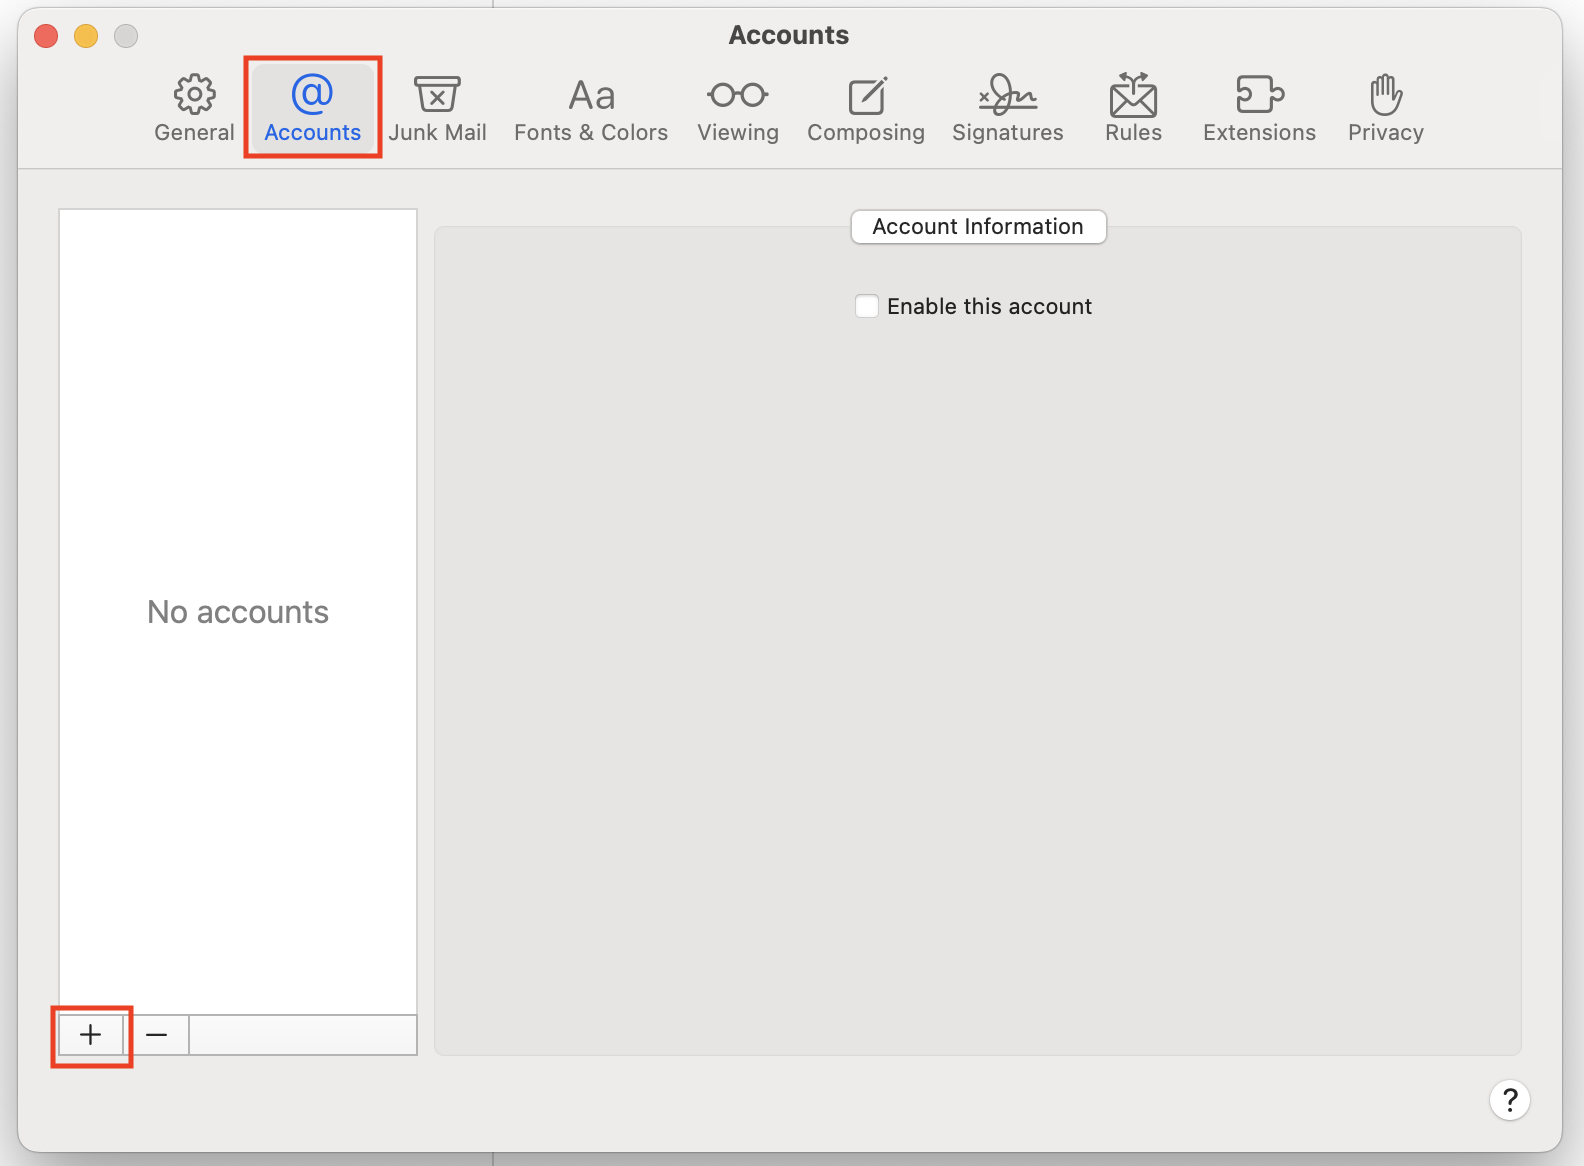
Step 8: Choose Other Mail Account
Select Other Mail Account...
Click Continue.
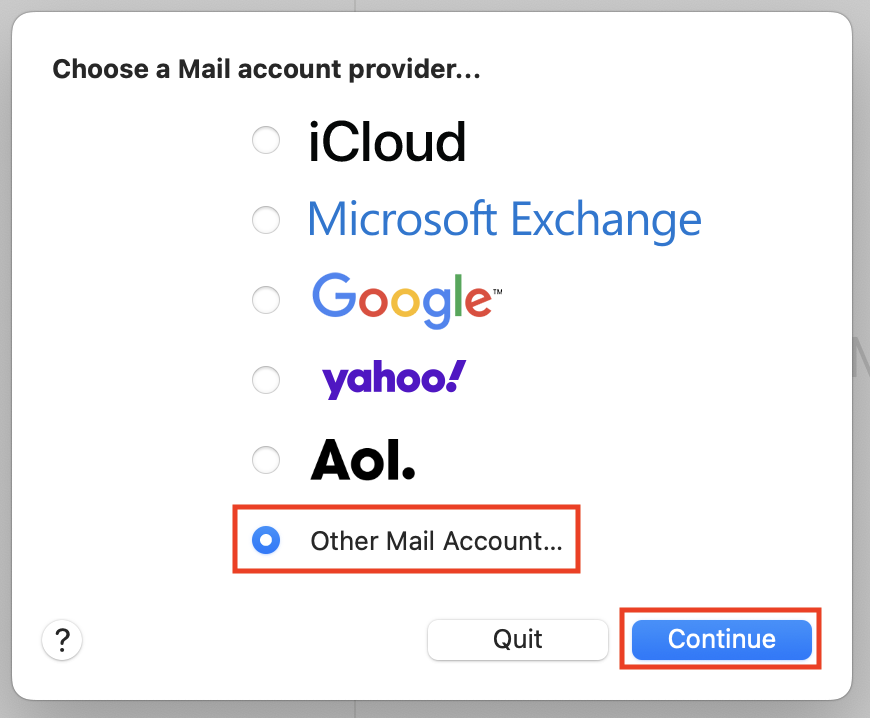
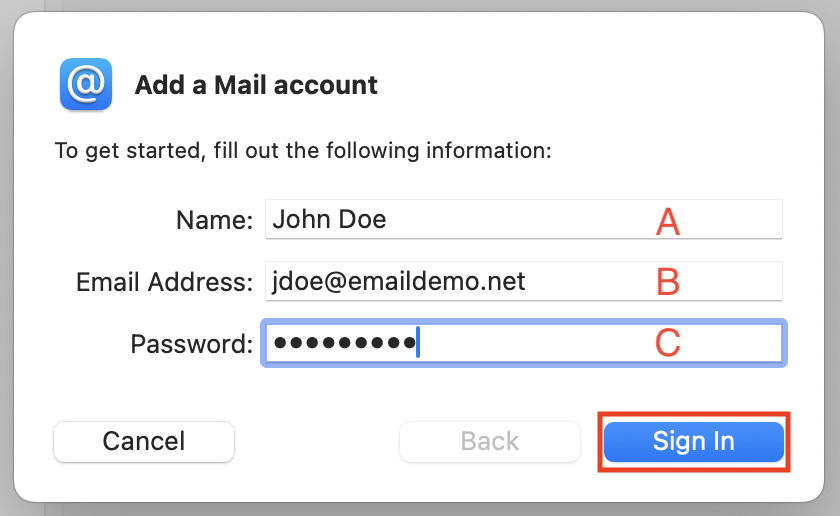
Step 9: Fill in your details
Complete these fields:
A) Enter your name. This is the name recipients see on all outgoing messages.
B) Enter your email address
C) Enter your email password
Click Sign In.
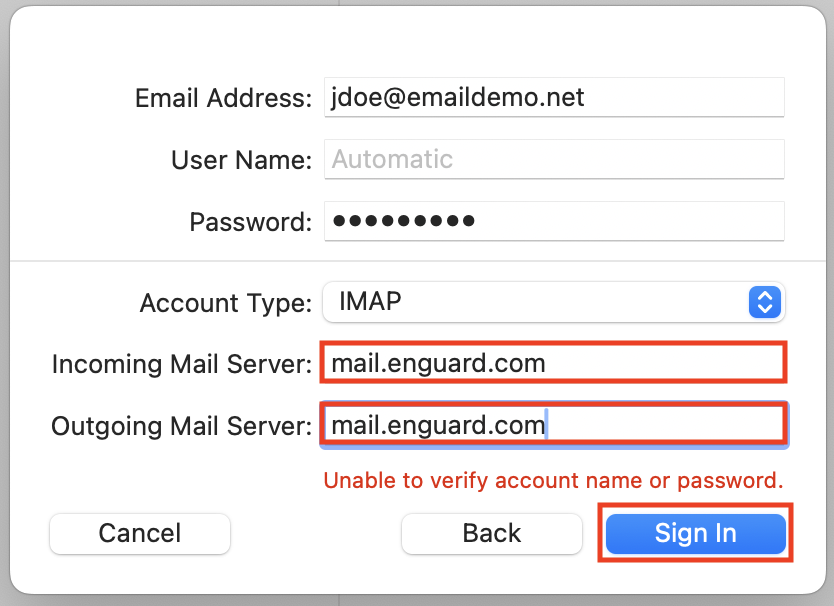
Step 10: Enter your mail server address
Enter your mail server address twice, then click Sign In.
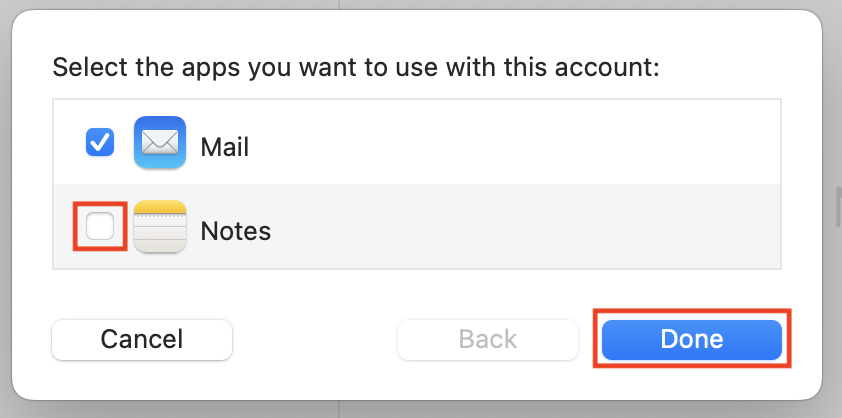
Step 11: Turn off Notes
Uncheck Notes, because it is not supported. Then click Done.
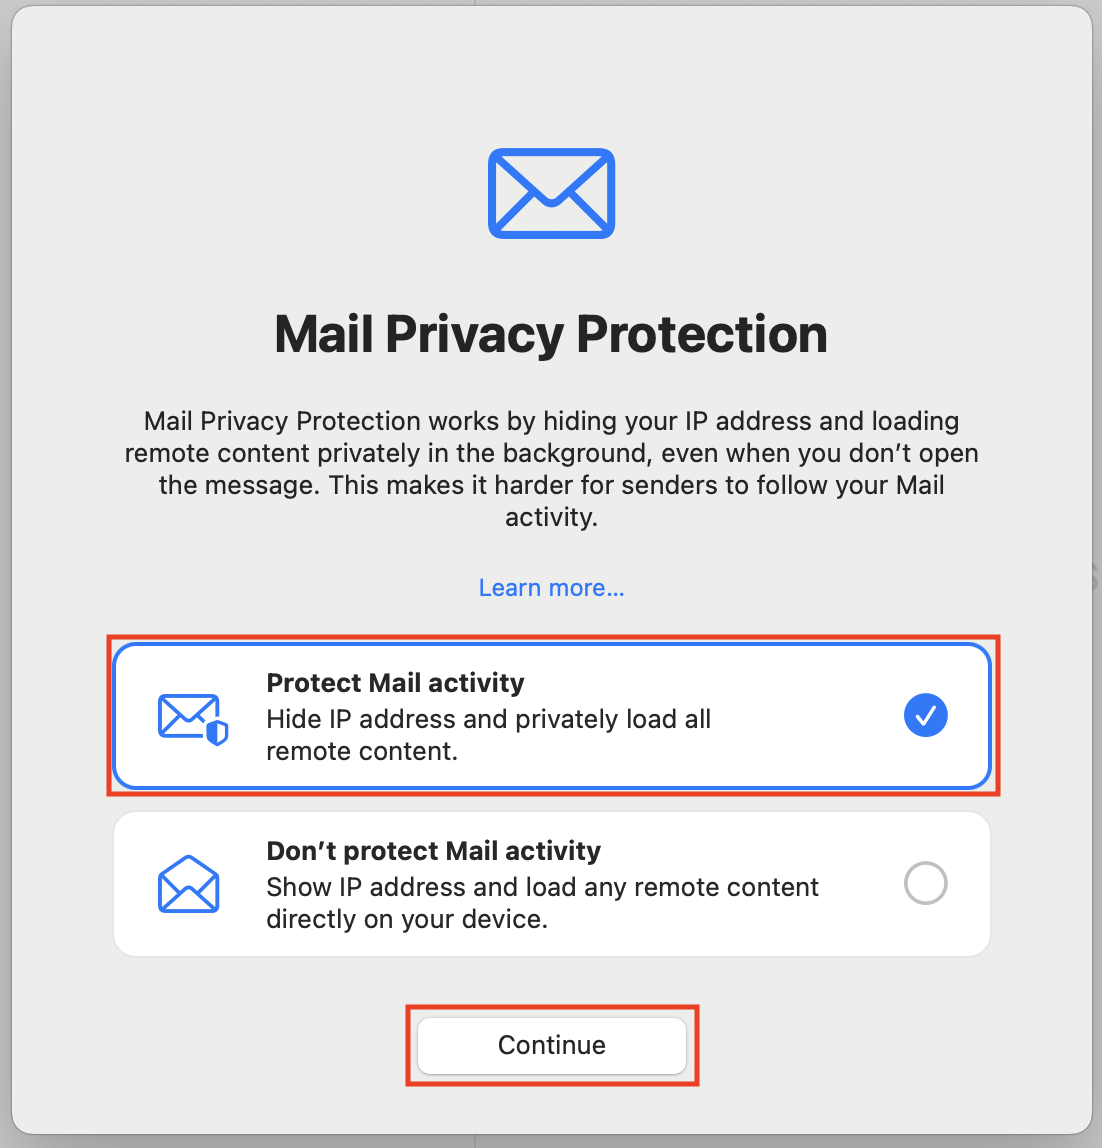
Step 12: Choose Mail Privacy Protection
If you see the Mail Privacy Protection prompt, we recommend selecting Protect Mail activity.
Click Continue.
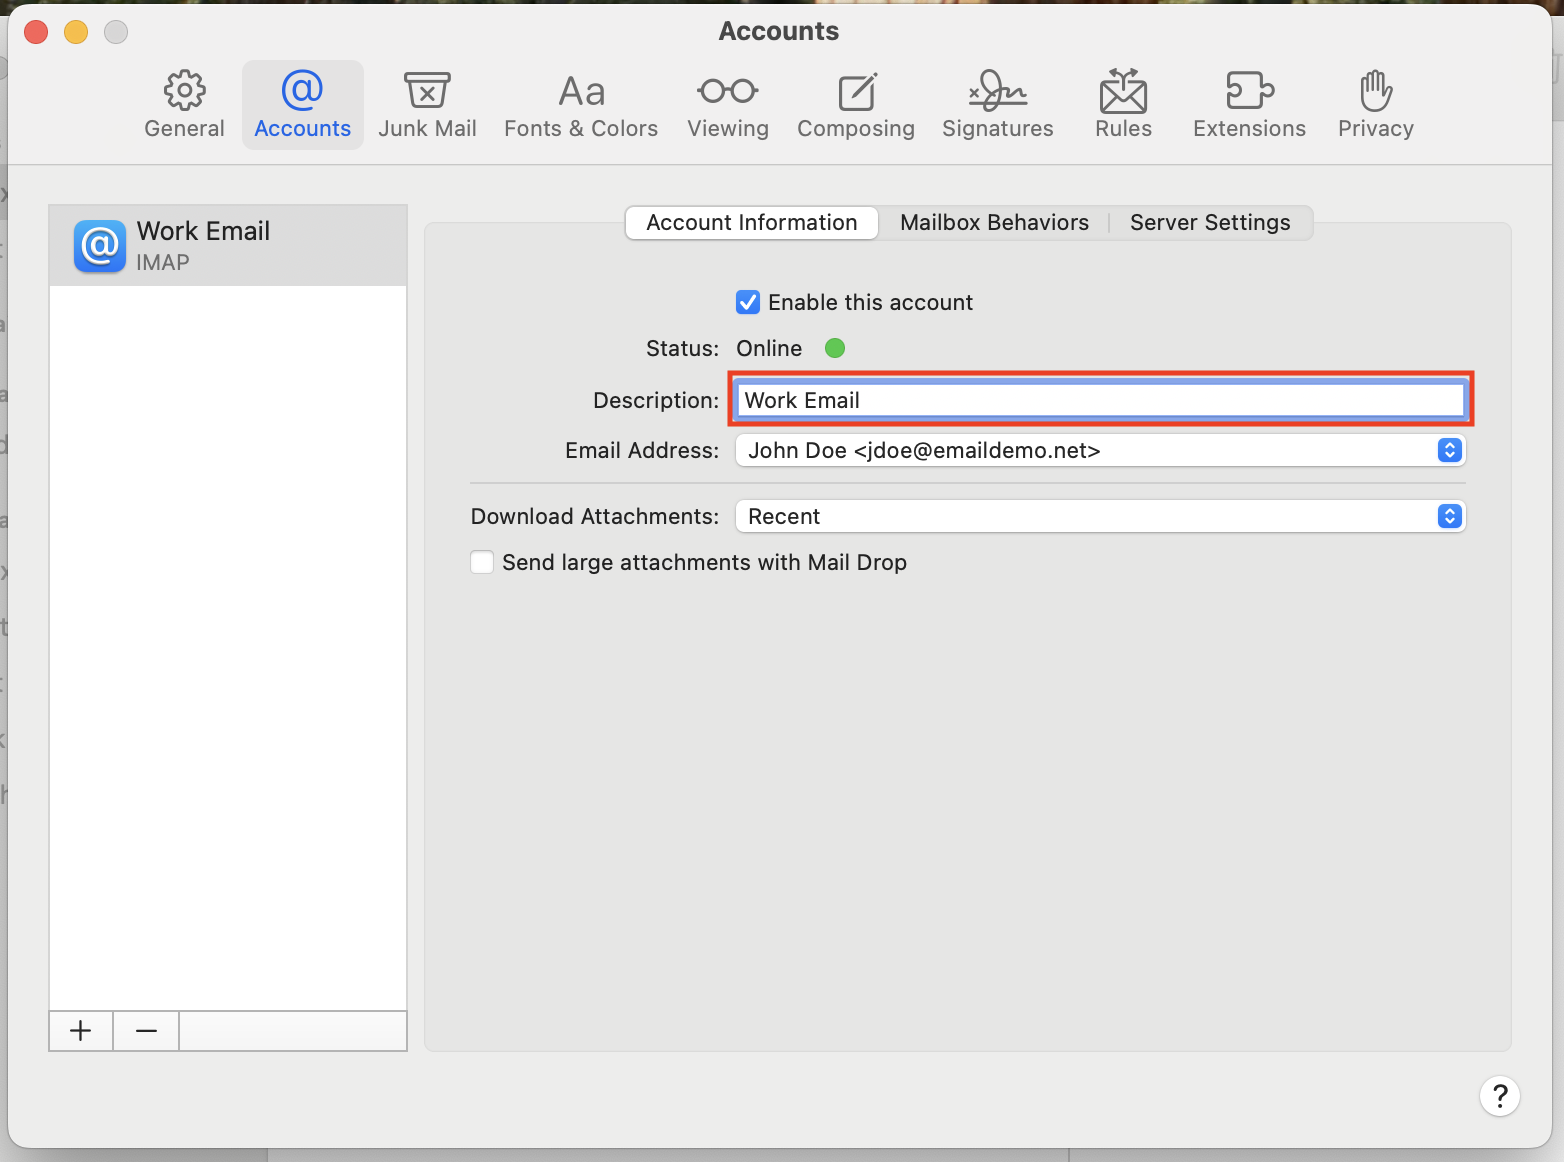
Step 13: Name the account
In Description, give the account a name you will recognize. This helps if you have more than one email account in Apple Mail.
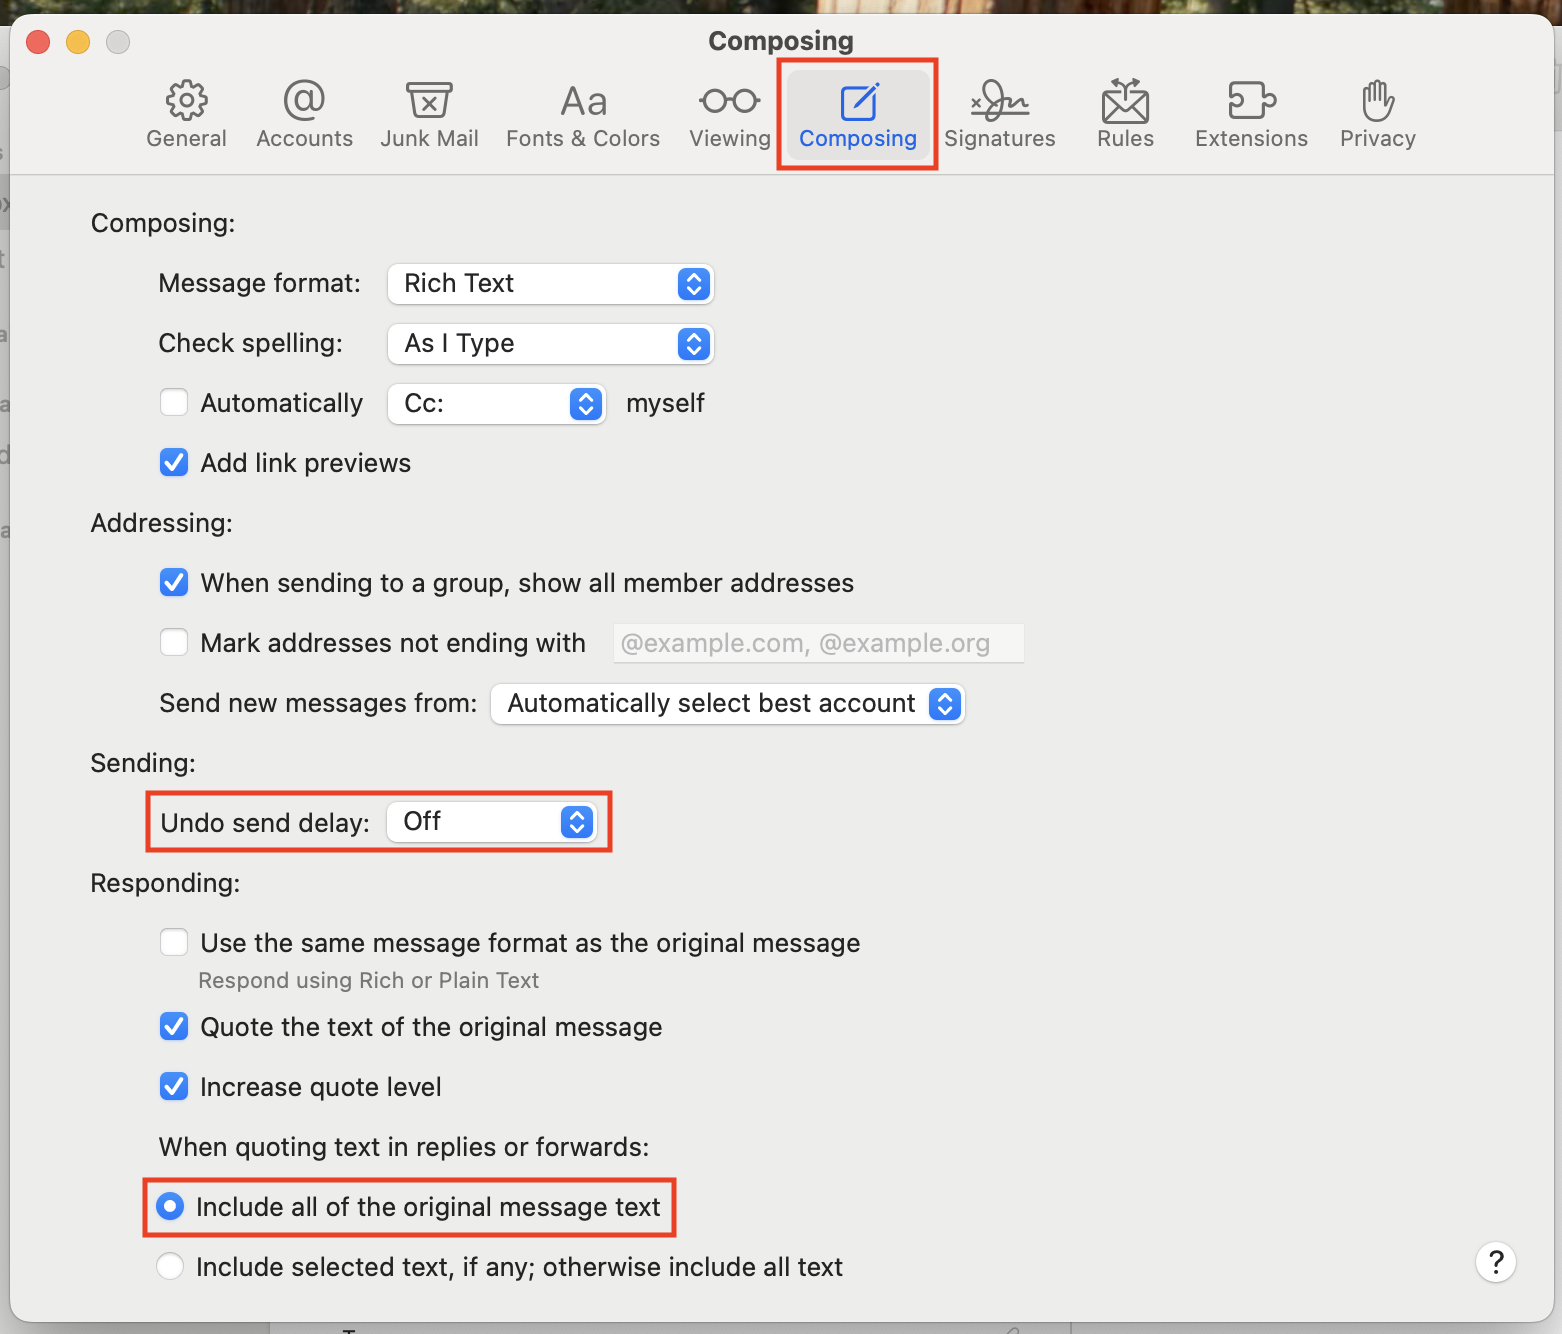
Step 14: (Optional) Change the undo send delay
By default, Mail waits 10 seconds before sending, so you can cancel if you change your mind.
To turn that off and send immediately, go to the Composing tab and choose Off from the Undo send delay drop-down.
To include all previous replies when you reply to an email, choose Include all of the original message text.
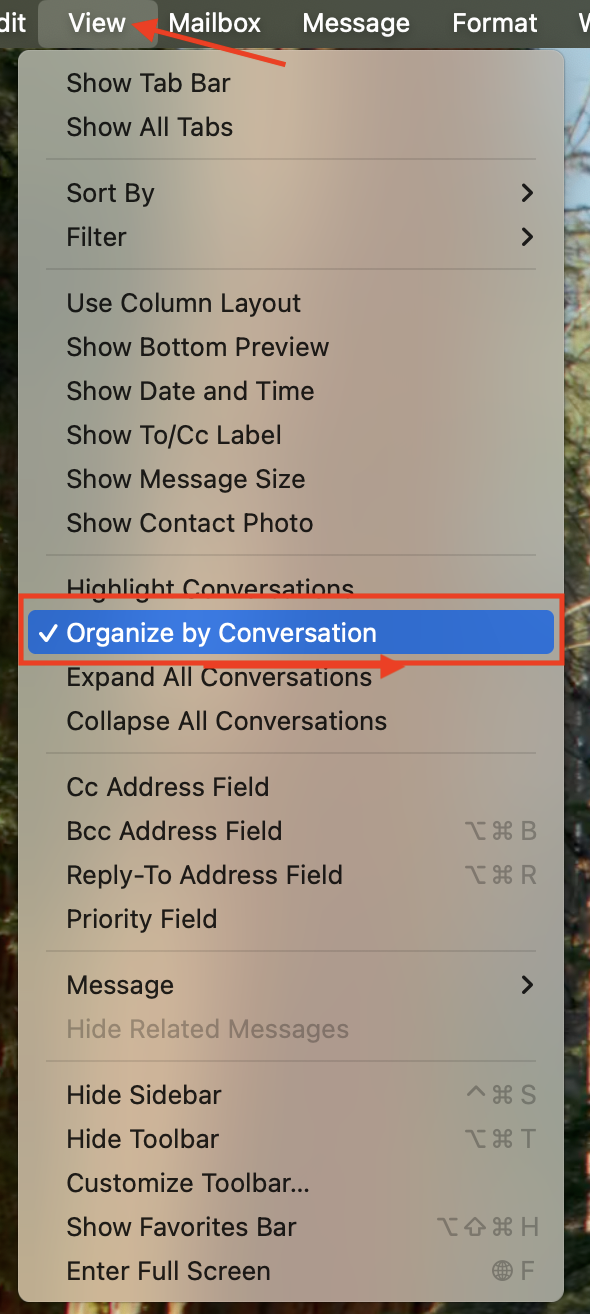
Step 15: (Optional) Turn off Conversation view
Mail turns Conversation mode ON by default. Some people like it, some do not.
To turn it off, click the View menu (top left) and choose Organize by Conversation to remove the checkmark. Repeat this step to turn it back on.