

EnGuard Scheduling
Let people book a time with you themselves, using a public scheduling page.
Sending invitations works fine, but it can take a lot of time. Say you run a consulting business and offer a free first consultation. It would be easier if people could pick a time themselves, a time that fits both your schedules.
EnGuard Scheduling does that. You set up meeting types, set when you are available, check several calendars for conflicts and more. You can share a public URL for people to book a time, or embed the scheduling page in your own custom page to match your branding.
When someone books a time, a meeting invitation goes to both the visitor and you. Your copy is accepted automatically and added to your calendar with all the details.
Part 1: Turn on Scheduling
Step 1: Open More
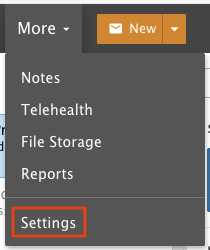
Click More in the top navigation bar.

Step 2: Open Settings
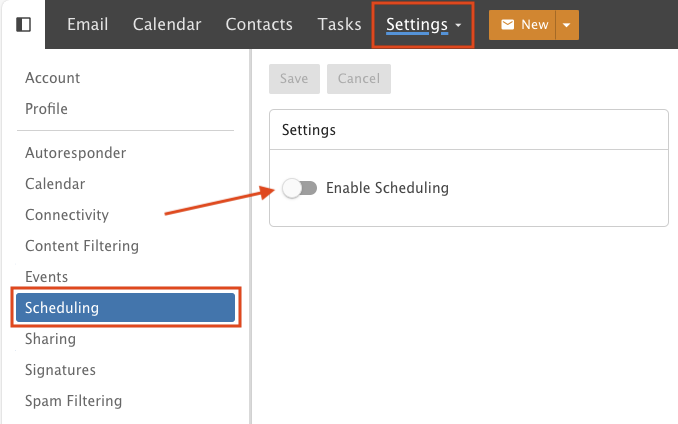
Click Settings.
Step 3: Enable Scheduling
Select Scheduling.
Turn on Enable Scheduling.
Part 2: Set up your scheduling page
Settings
The Settings card holds the basic rules for Scheduling.
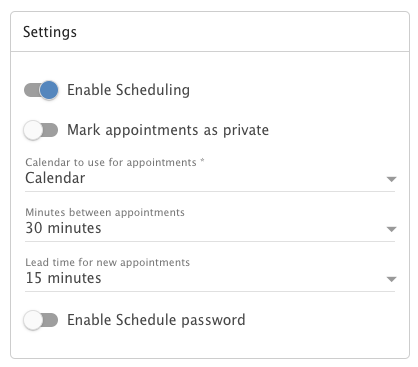
Enable Scheduling: turns the feature on. When it is off, all the other cards are hidden.
Mark appointments as private: blocks out the time on your calendar without showing the details. It works like marking an appointment private in an invitation.
Calendar to use for appointments: the calendar that booked appointments go on. The drop-down lists your default, custom and shared calendars.
Minutes between appointments: the gap between booked appointments. The default is 30 minutes. For example, if someone books a 1-hour appointment at 9:00 a.m., the next time offered is 10:30 a.m.
Lead time for new appointments: how soon from now someone can book. For example, at 9:00 a.m. with a 30-minute lead time, the first time offered is 9:30 a.m. This gives you time to prepare.
Enable Schedule password: password protects your public Scheduling page. Only people with the password can book.
Appointment Types
An appointment type is the kind of meeting someone books with you, such as an interview, a demo, an initial consultation or a training session. Visitors pick a type from a drop-down on your scheduling page.
To add one:
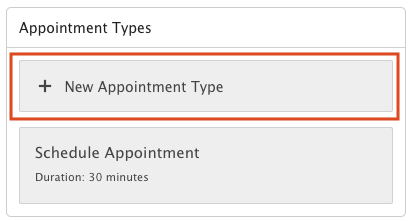
- Click the New Appointment Type button. A pop-up opens.
- Type a Name for the type, for example Consultation.
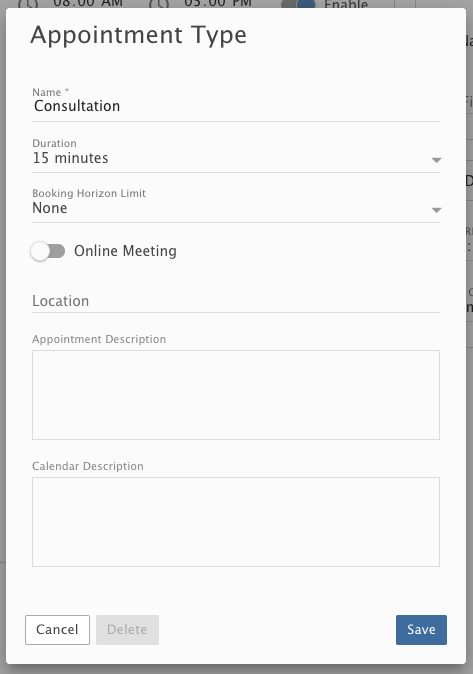
- Set the Duration. You can pick 15-minute steps up to an hour, then hourly up to 12 hours.
- Set the Booking Horizon Limit. This is how far ahead someone can book. For example, choose 2 weeks if nobody should book further out than 2 weeks from today.
- If the appointment is an EnGuard Telehealth Meeting, turn on Online Meeting. A Telehealth meeting is created automatically for each booking, and its URL is in the invitations sent to you and the visitor.
- If you will use a Location other than an EnGuard Online Meeting, enter it. This is usually a phone call or a meeting room. You can also enter the same online meeting URL from EnGuard, or another one such as Microsoft Teams.
- Add an Appointment Description. This text shows on the Scheduling page. Use it for the purpose of the meeting or what you expect from participants.
- Add a Calendar Description. This goes in the calendar appointment sent to the visitor, and shows as the description on your own calendar too.
- Click Save.
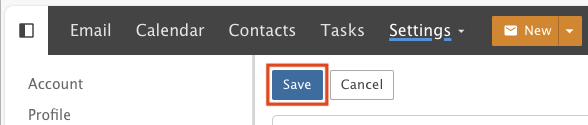
- Then save the page.
Calendars to Check for Conflicts
You may use several calendars. To avoid double booking, Scheduling can check more than one.
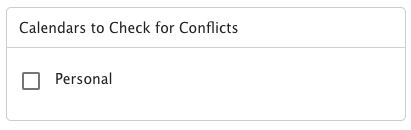
The Calendar to use for appointments from the Settings card is always checked. You can add others, such as a Training or Meetings calendar. Any calendar you have access to is listed, including shared calendars, domain calendars and web calendars.
To add another calendar, repeat the steps above. When you are done, save the page.
Availability
Availability is when you let the public book you. For example, if you only want afternoon appointments, set just those hours. These days and times are what visitors see on your page.
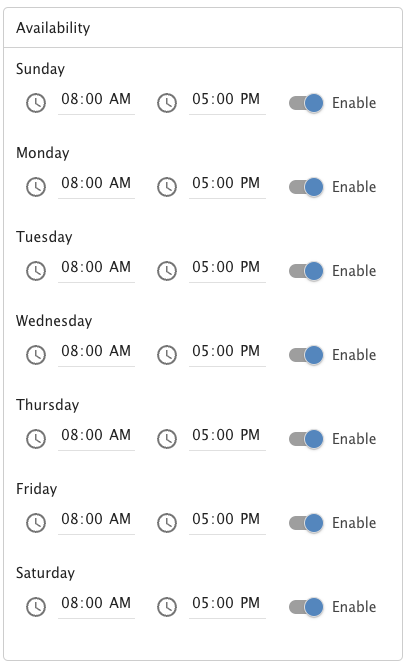
- Turn on the days you are available.
- Set your times for each of those days.
- Save the page.
Custom Fields
You might need some information before an appointment, such as a part number, a product name or a ticket number. Custom Fields collect it and include it in the meeting invitation.
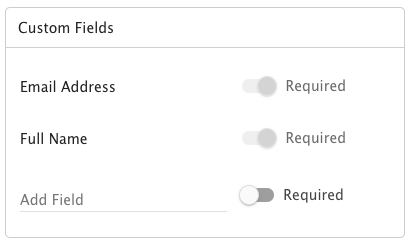
The visitor's email address and full name are always required. That is why they show and cannot be edited. You can add up to 5 more custom fields.
- Type the name of the custom field on the line.
- If it is required, turn that on in the same line.
- A new line appears. Add more fields if you want.
- Save the page.
Page Details
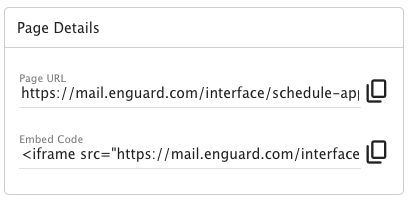
Page URL: the address of your public scheduling page. Put it in your email signature, at the bottom of emails or on your contact page. Visitors go here to book.
Embed Code: lets you embed your scheduling page in a custom page. This way you can show your own colors and logo so visitors feel more comfortable booking.