

Setting Automatic Forwarding
Forward your incoming email automatically to another address on our service.
Auto-forwarding only works to addresses on our service. Forwarding automatically outside our service would not be HIPAA compliant. You can still forward a message by hand to anyone you want.
Step 1: Open Settings
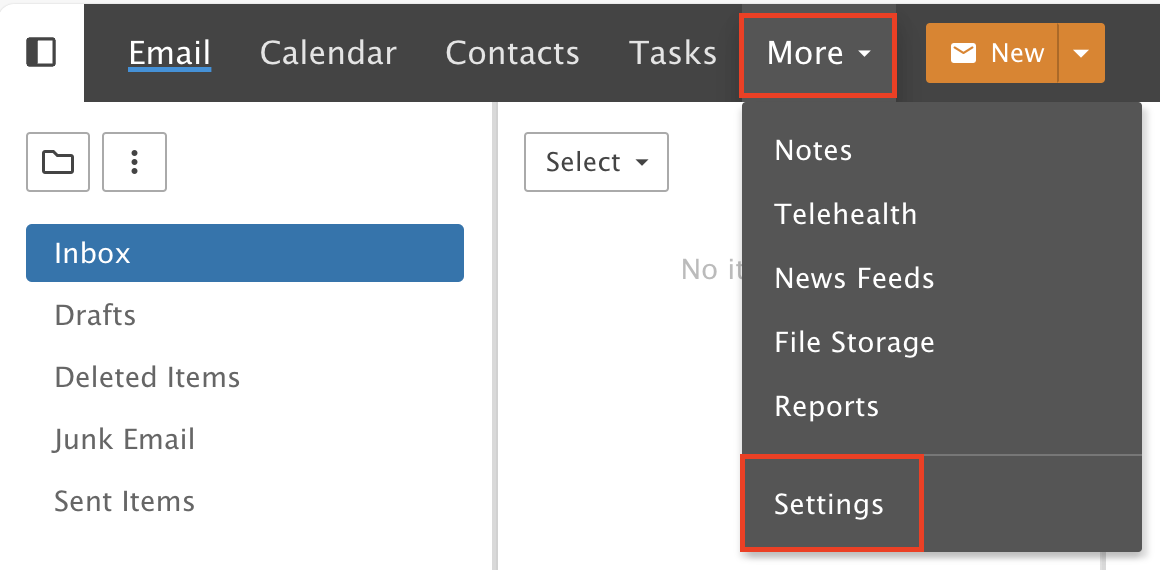
Click More, then Settings.
Step 2: Set up your forwarding
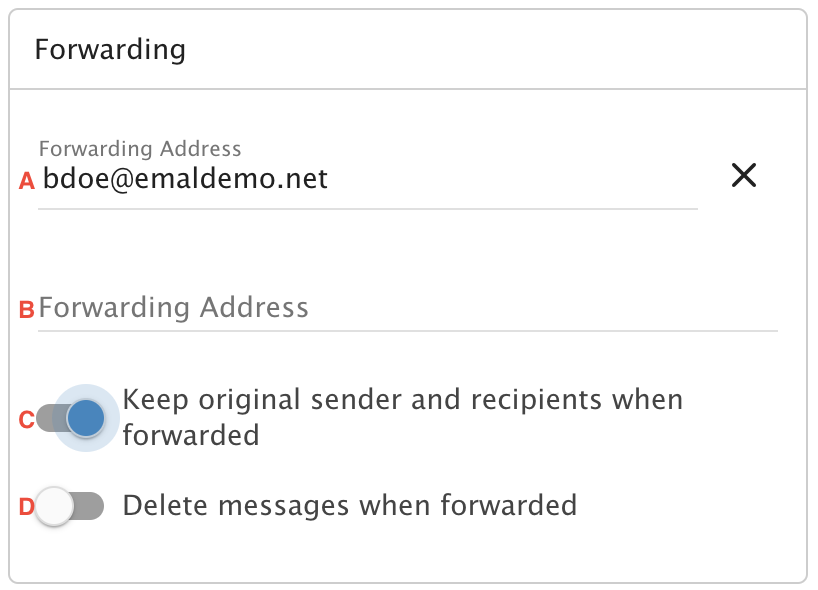
A) Add the address you want to forward incoming messages to. It has to be an address on our service.
B) You can add more forwarding addresses. Each time you add one, a new line appears.
C) Turn on "Keep original sender and recipients when forwarded". If you leave it off, forwarded messages look like they were sent by your address instead of the original sender. Only leave it off if it makes sense not to show the original sender. This is very rare.
D) If you do not want the messages to stay in your address, turn on "Delete messages when forwarded". This deletes them from your address and delivers them to the address you forward to.
Step 3: Save
Click Save.
